Unity Game Dev Project Post 1
This is part 1 of a gamedev project and tutorial. As I continue to implement features in the game, I will document them with detailing the steps I’ve gone throw to get the mechanic working in the game.
Game Summary
The game will be first person in a sci fi setting, and the central mechanic will be creating computer programs to run on computers in the environment to complete an objective. Each computer will be connected to a “System” that performs an action in the world. This could be opening a door, aiming a laser or running life suport on a spacecraft.
The player will interact with computers using a hand held PDA terminal that they can plug into a computers debug port, and allows them to write and debug the program running on the computer.
The development process in unity is centered on designers rather than developers. Because of this I will focus on developing features as their own individual components where possible. I will also aim to have design time support for each component so they can can easily be tweaked without requiring the game to be run. This first part will begin with by detailing how to implement a text editor control for displaying code.
Code Editor Behaviour
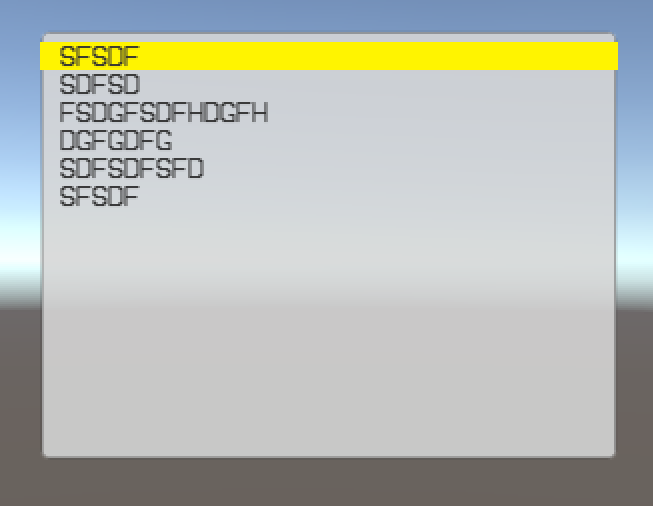
When we debug this programs, we will want to be able to step through them as they execute, and clearly display which line is currently being executed. This could be done by using the inbuild unity rich text features, but that will only highlight the text, not the entire line. By modifying the TextInput, we can add a shape behind its text that can be moved up and down, inline with each line of text.
- Highlight should align with the lines of text
- Highlight should resize to match the size of the editor window
- Input control should have adjustable fontsize, and the line highlight should adjust to match the existing font size.
- Want size adjustments to be visible at design time, so the editor and content can be tweaked without having to run the game.
Editor window concept preview:
Creating Code Editor input
As this centers around writing and debugging programs, the first task is to create a UI control that allows us to do this.
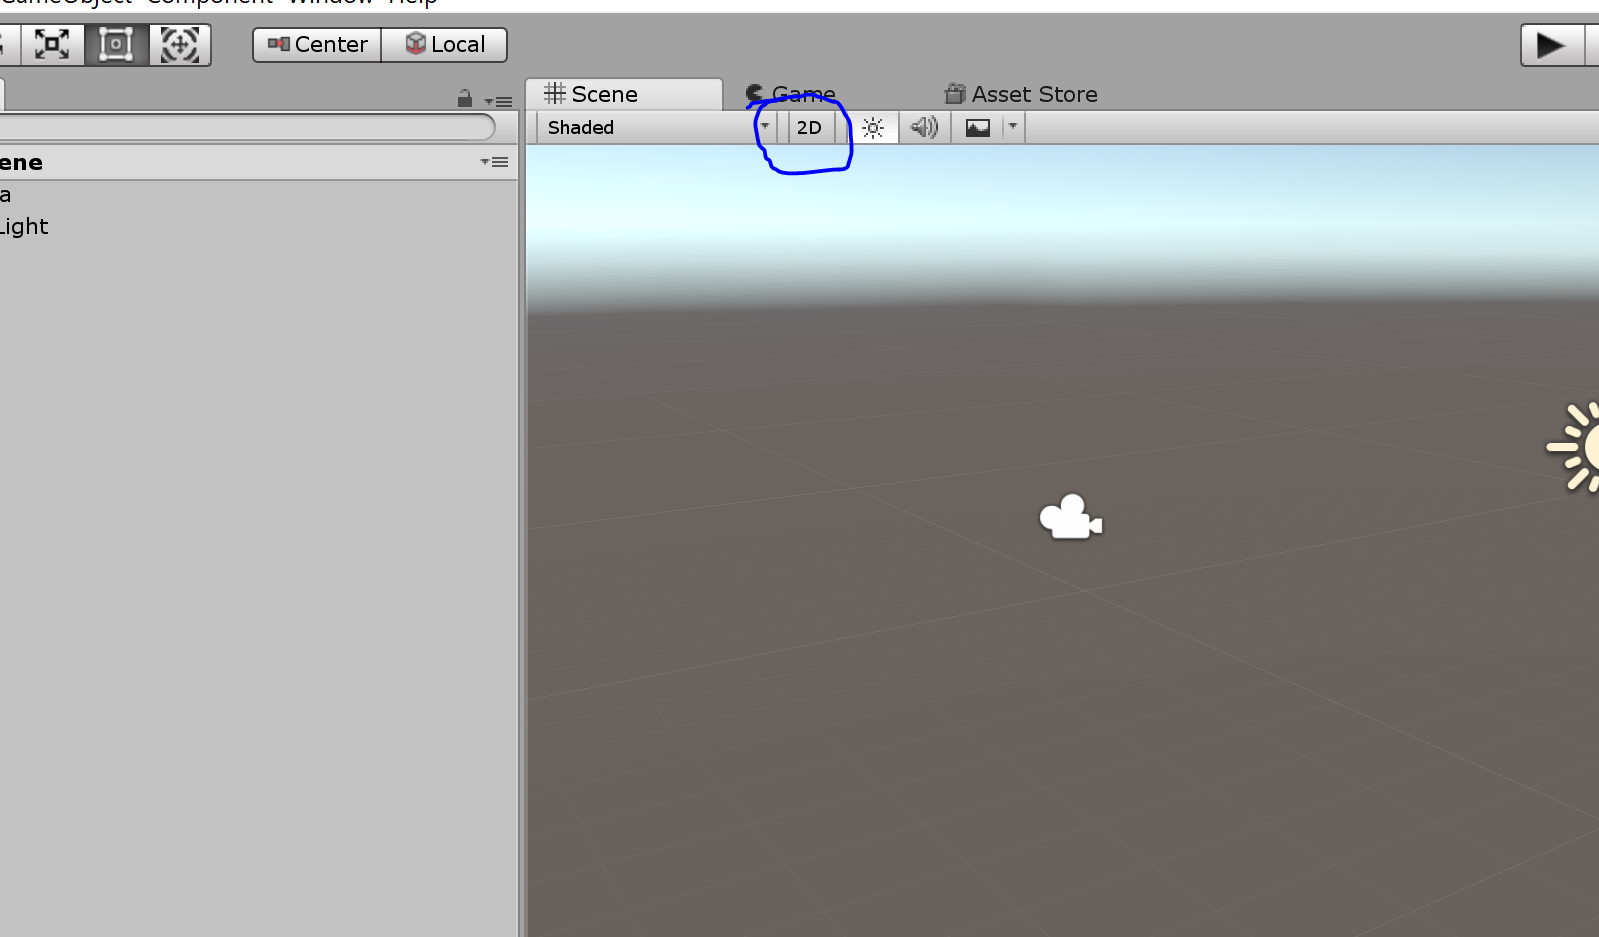
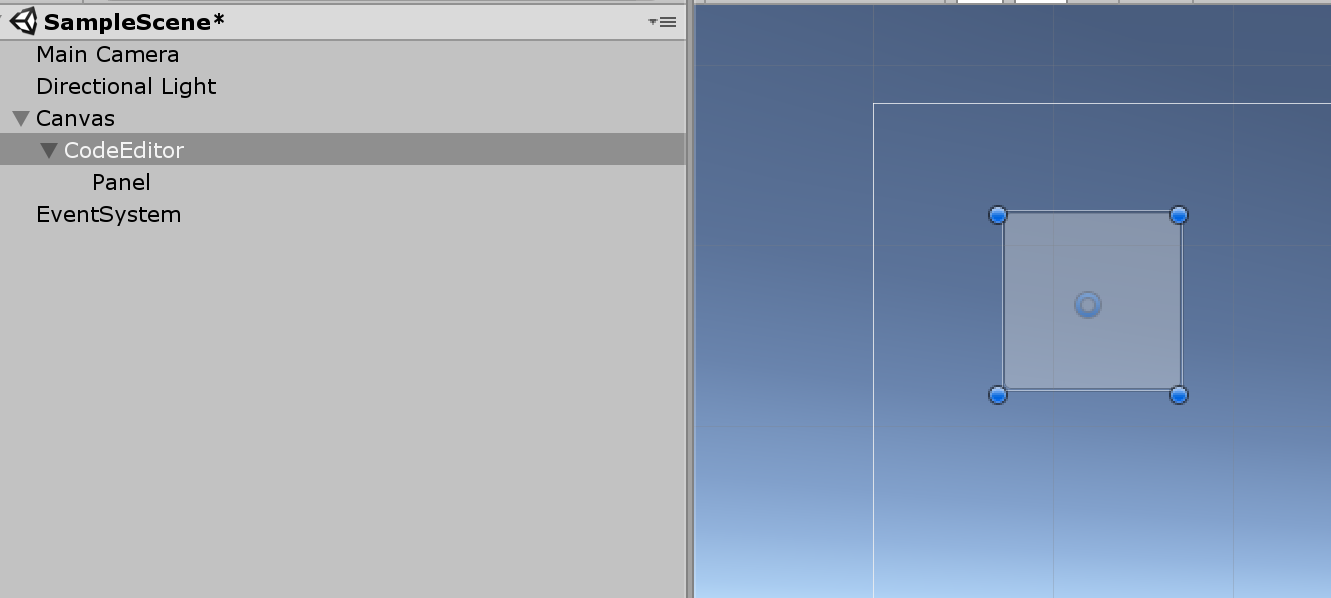
- Switch the unity editor to 2D mode
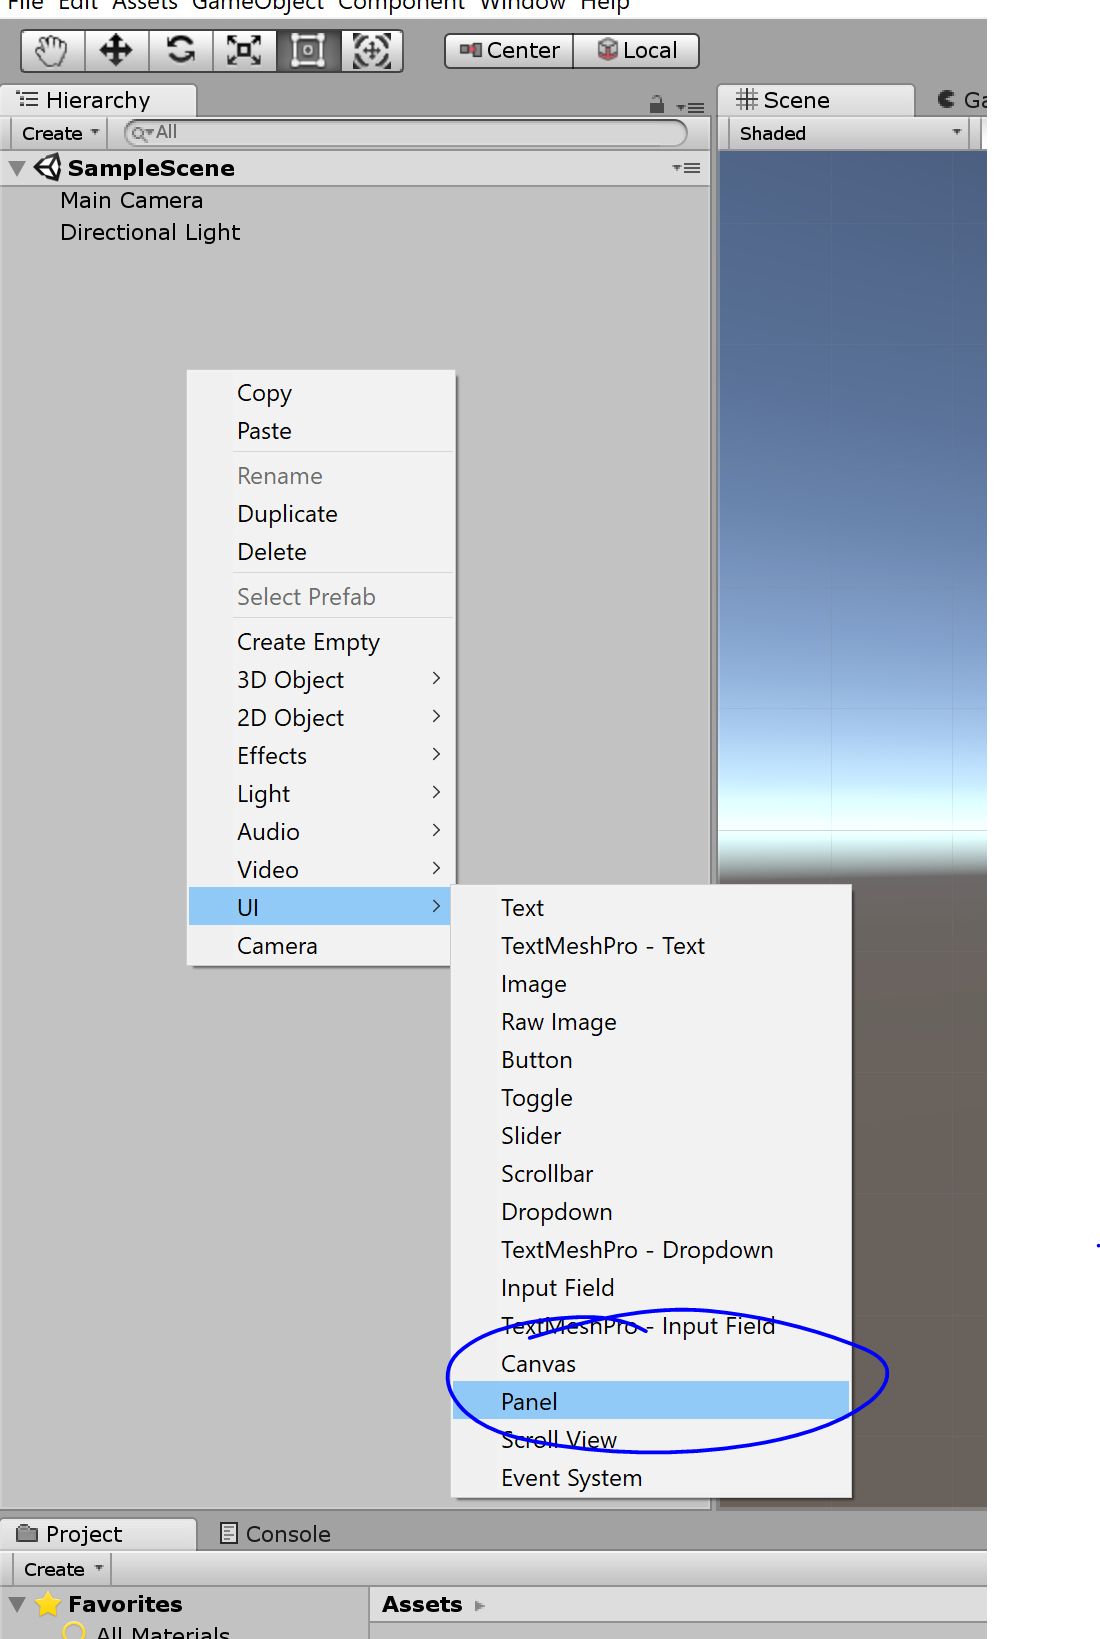
- Create Panel - Comment on how this creates the event system
- Double click on the panel to resize and focus the view
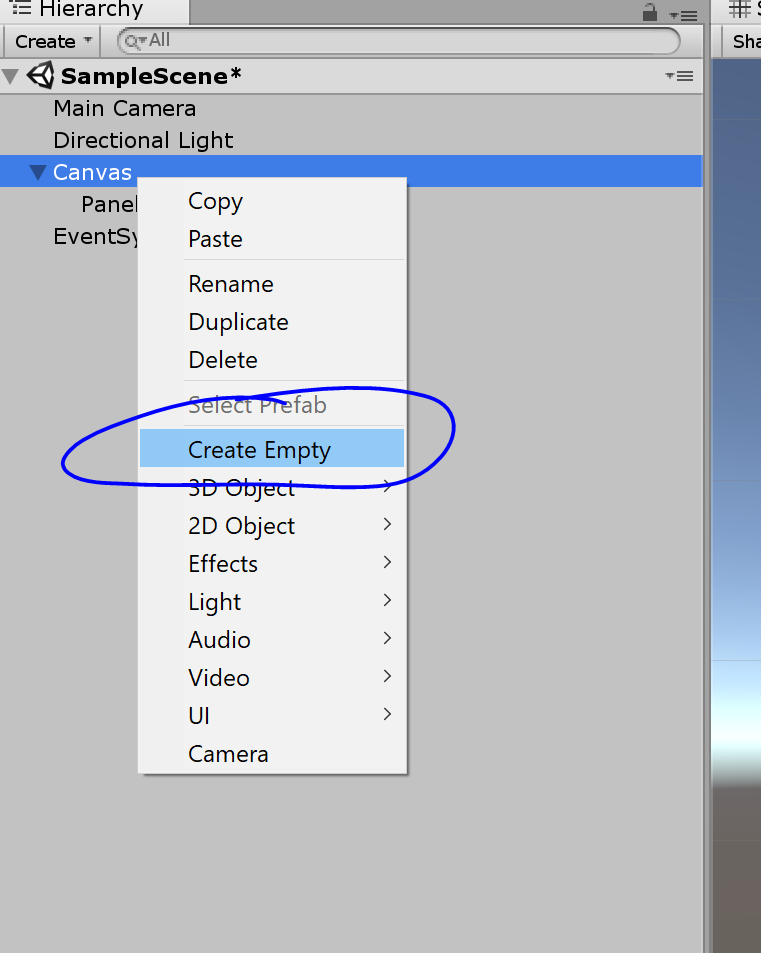
- Create empty gameobject on the canvas, and name it “CodeEditor”
- In the project structure view, drag the panel under the CodeEditor object
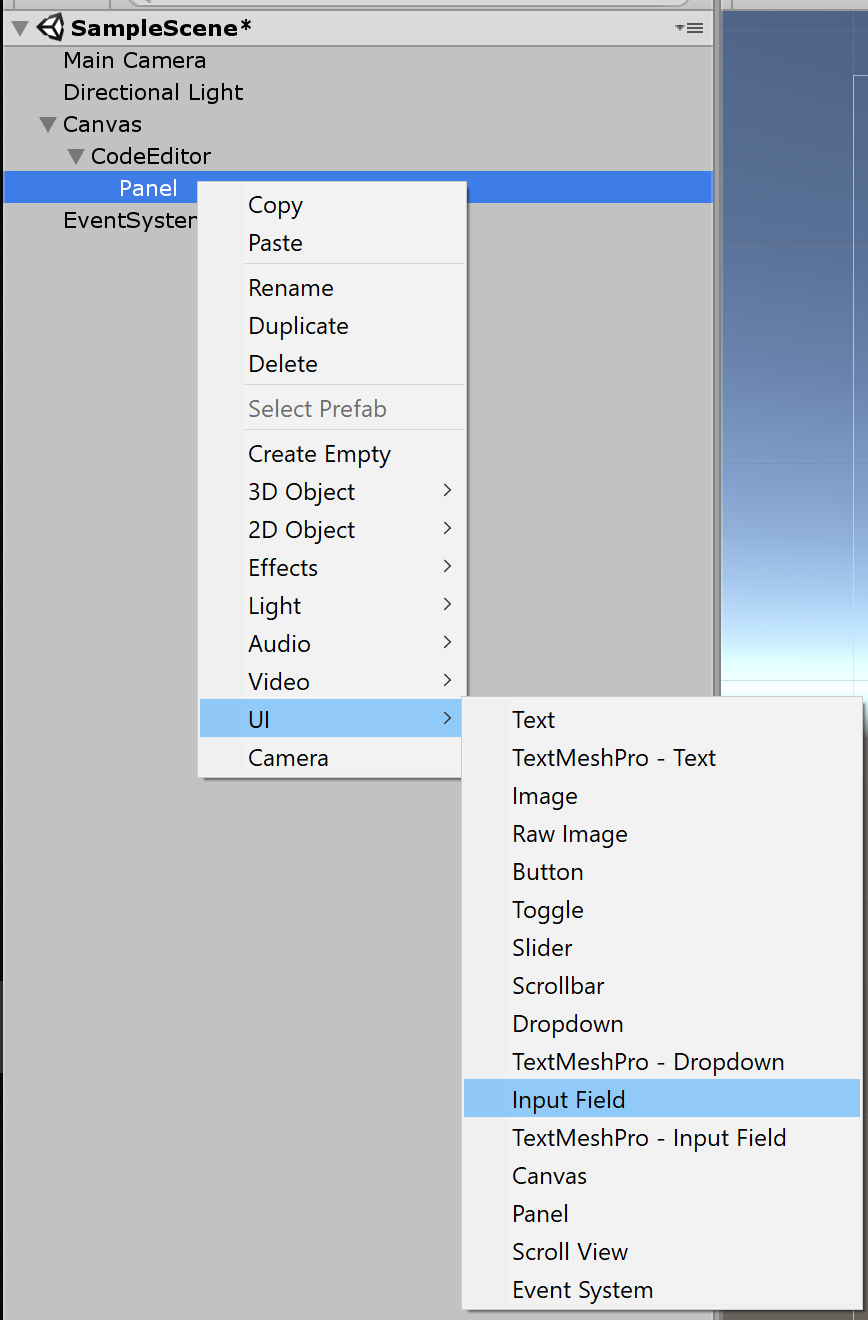
- Create a Text Input under the Panel node
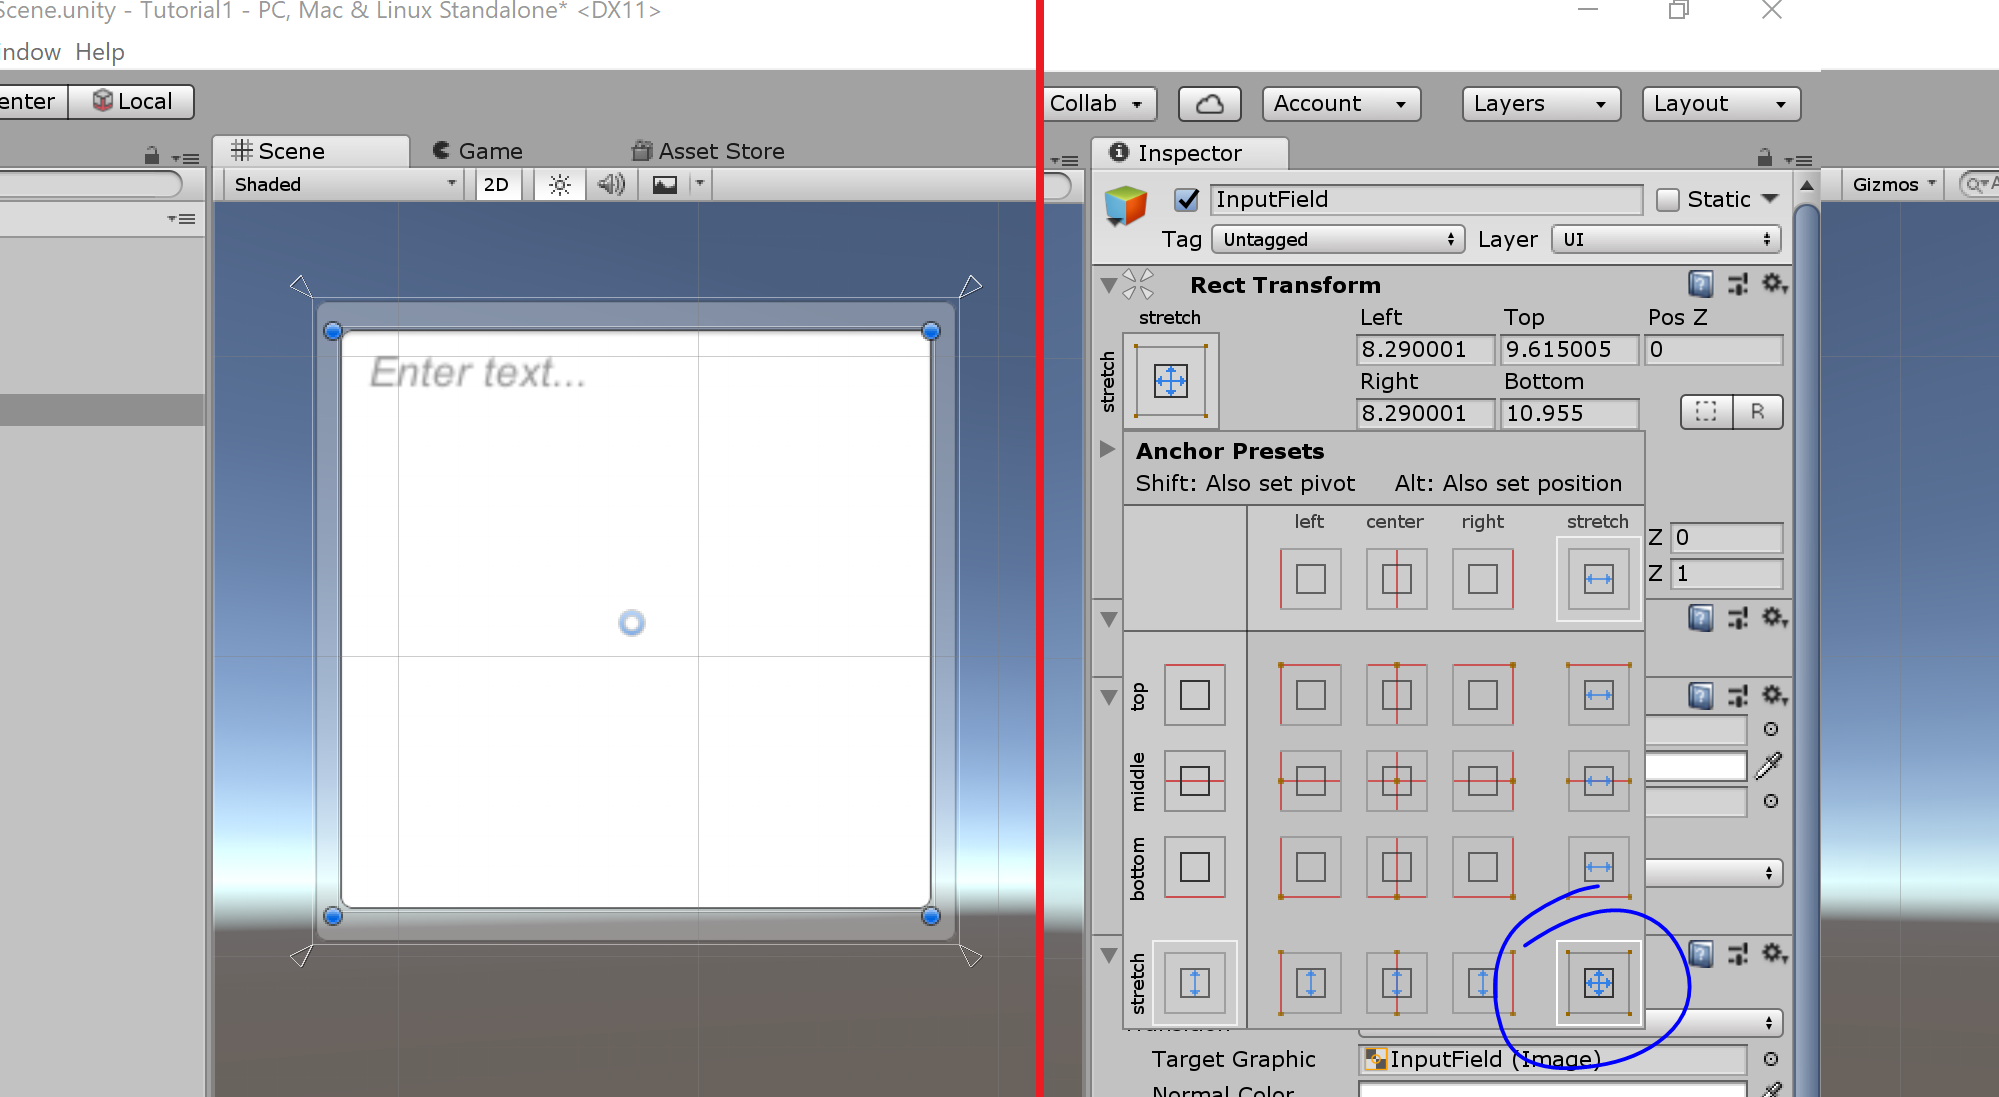
- Resize the Text Input to cover most of the panel, and set the resize mode to stretch on both dimensions
- Input Field “Line Type” to “Multi Line Newline”
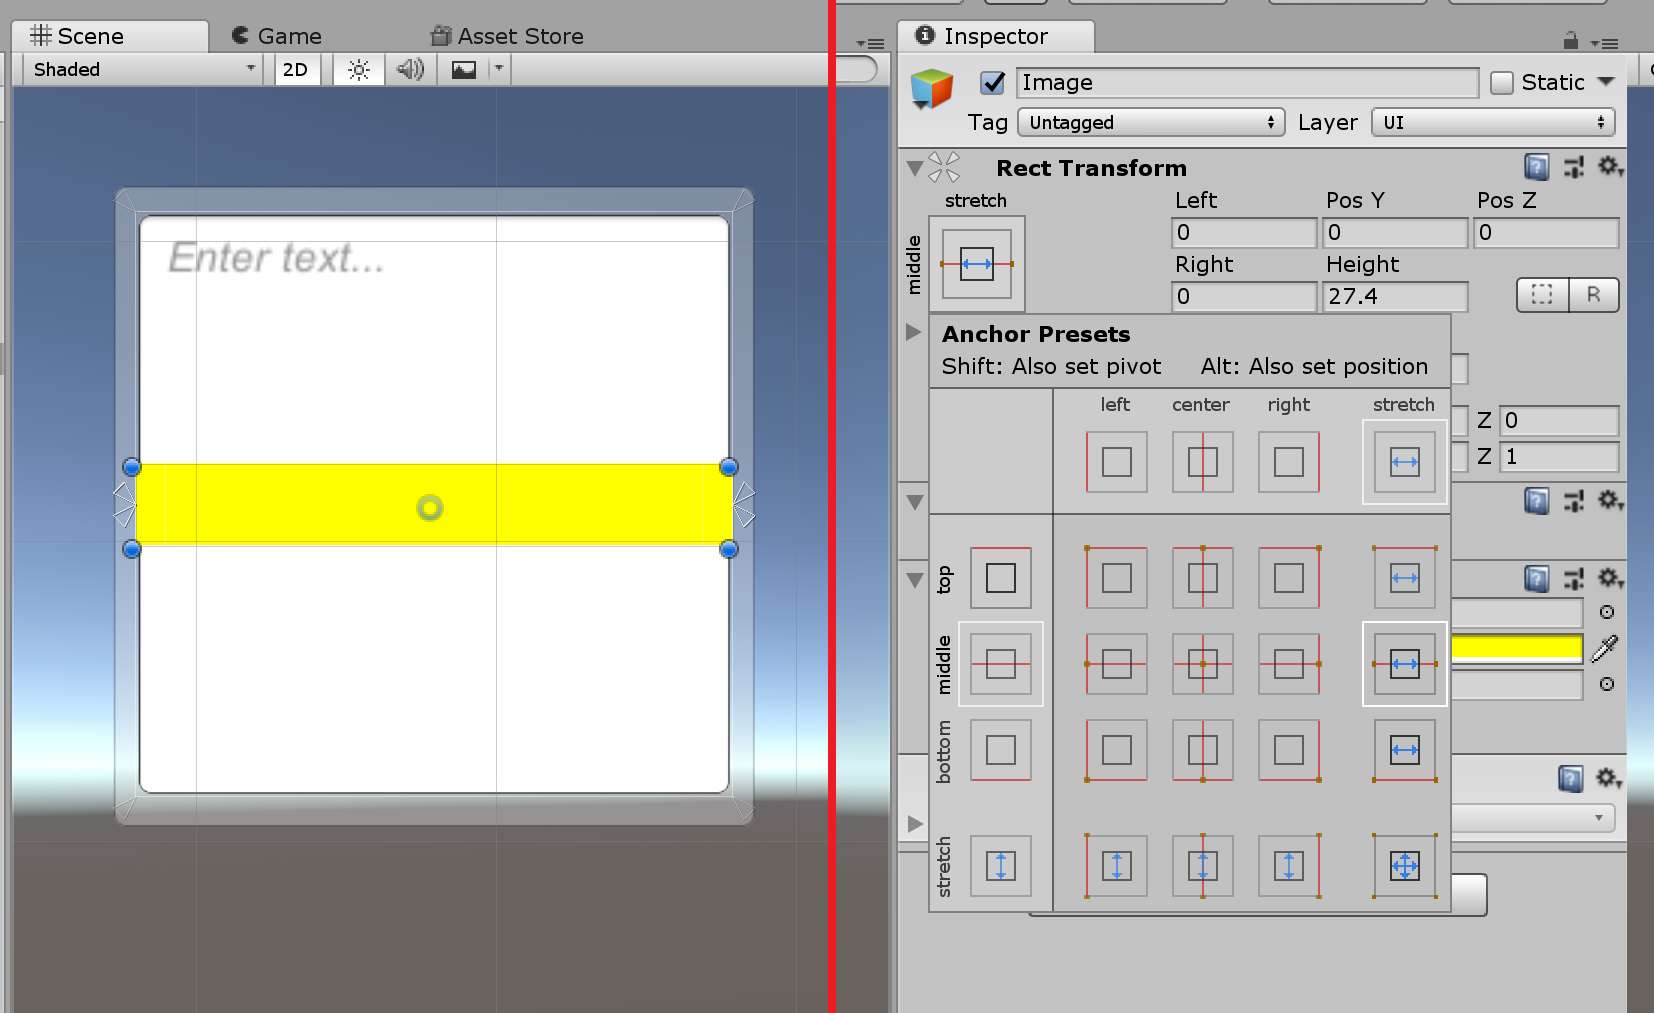
- Create Image under the Text Input node
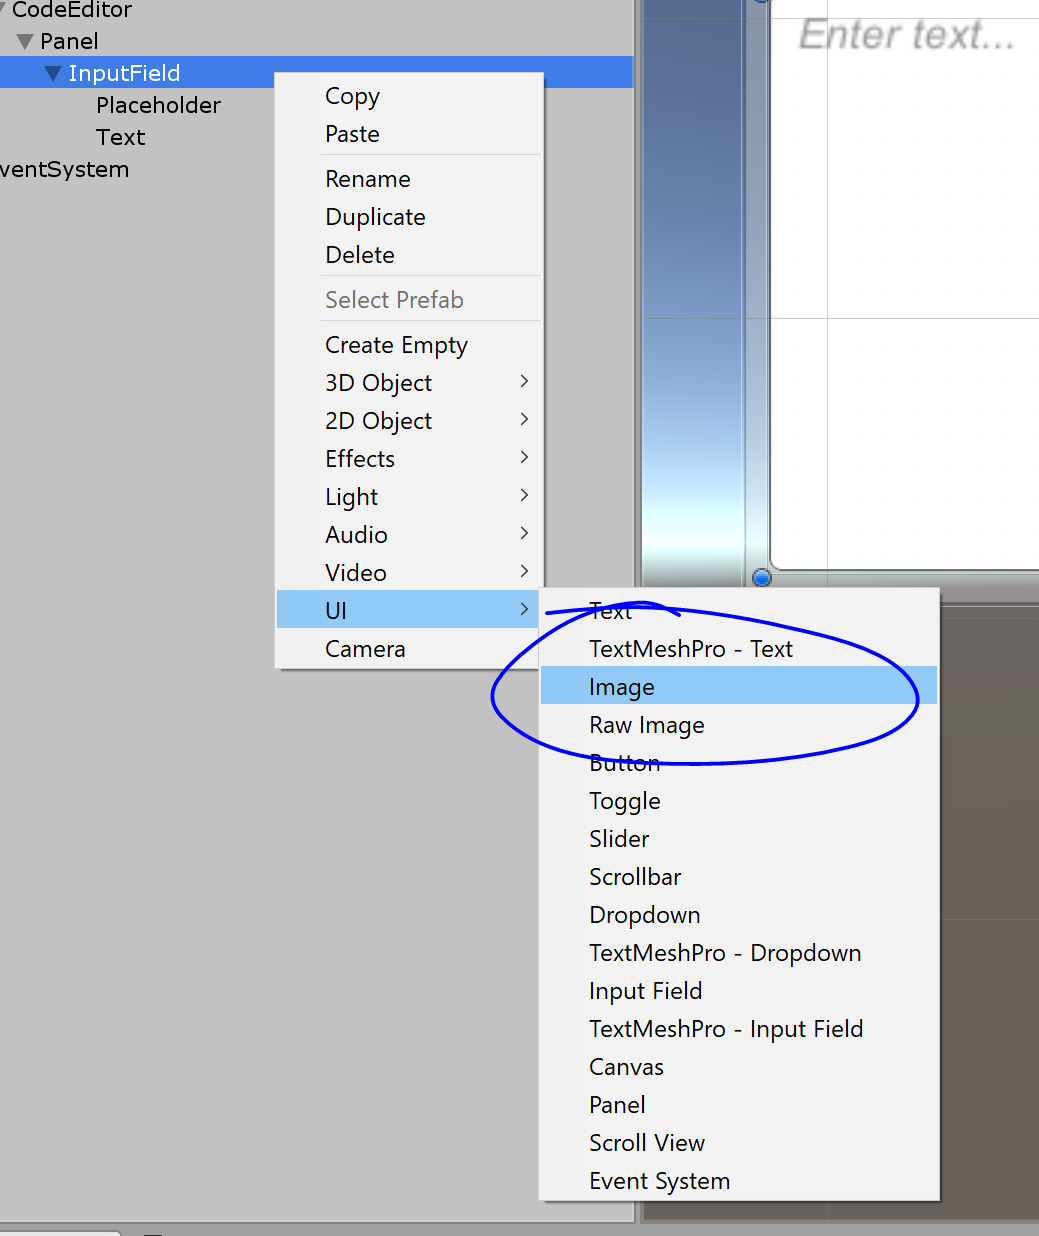
- Move Image between Placeholder and Text
- Set image colour to yellow, resize to be the width of the Text Input, set Scaling to horizontal stretch
- Create script in scripts folder, add following script
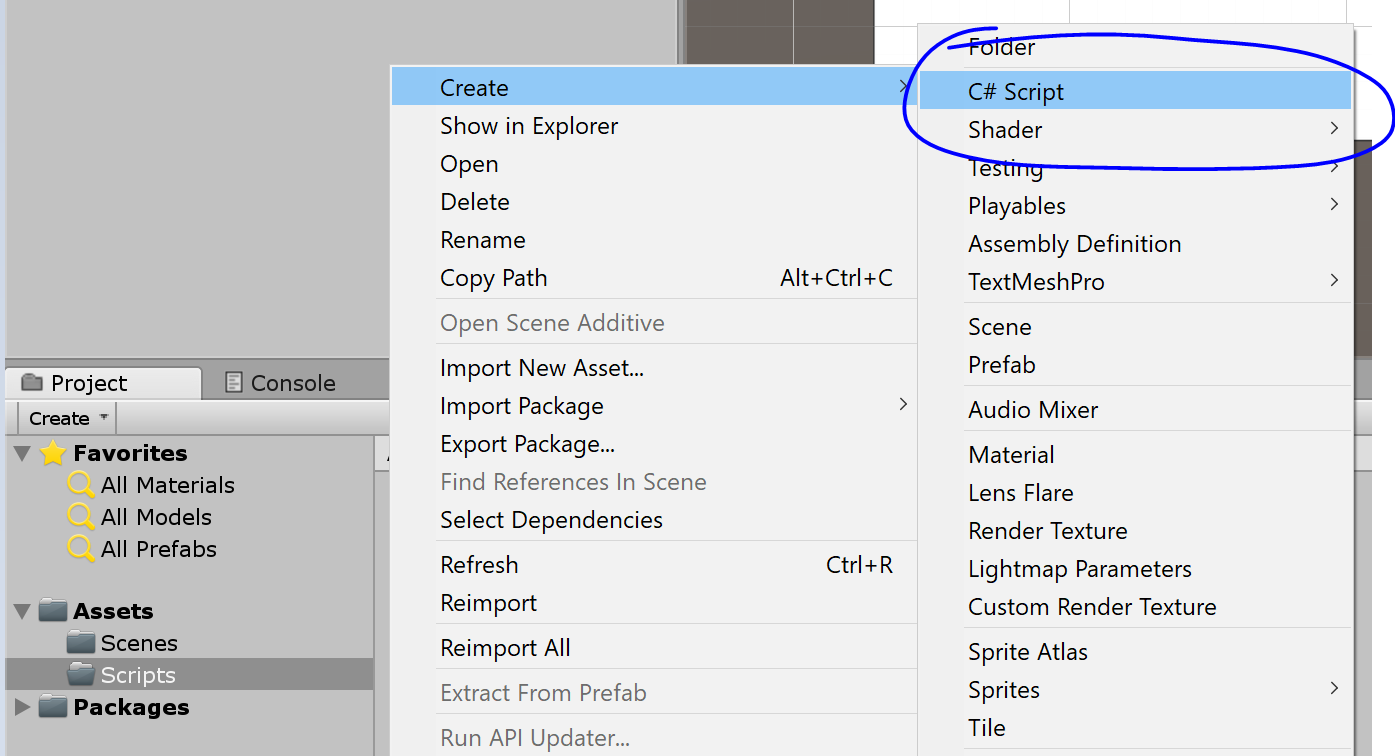
- Double click on the script to open it in an editor
using System.Linq;
using UnityEngine;
using UnityEngine.UI;

[ExecuteInEditMode]
public class CodeEditor : MonoBehaviour
{
    // Input field for the text content
    public InputField InputField;
    // Image used for line highlighting
    public Image LineHighlight;

    // Line number that is currently being highlighted
    [Range(0, 255)]
    public int CurrentHighlightedLine = 0;
    // LineHeight/Font Size
    [Range(0, 255)]
    public int LineHeight = 20;
    // Text to display in the
    [TextArea]
    public string Code;

    // Update is called once per frame
    void Update()
    {
        // Propagate text changes from the Text Input to the CodeEditor. This only needs to happen while running
        if (Application.isPlaying && InputField)
        {
            Code = InputField.text;
        }

        if (InputField == null) return;

        var textElements = InputField.GetComponentsInChildren<Text>();
        // Adjust the font size for the preview and display text objects
        foreach (var text in textElements)
        {
            text.fontSize = LineHeight;
        }

        // For sizing take first and assume all are the same size
        var textElement = textElements.First();

        var textRect = textElement.GetComponent<RectTransform>();
        var highlightTransform = LineHighlight.transform;
        // Adjust the element line highlights vertical size to match the font size
        LineHighlight.GetComponent<RectTransform>().SetSizeWithCurrentAnchors(RectTransform.Axis.Vertical, LineHeight);
        // Position the LineHighlight behind the correct line number
        highlightTransform.localPosition = new Vector3(highlightTransform.localPosition.x,
            (-LineHeight * CurrentHighlightedLine) - (LineHeight * 0.5f) - textRect.rect.yMin, 1);
    }

    // Updates the InputField text to match the code that has been entered in the Editor Field
    void OnValidate()
    {
        if (InputField)
        {
            InputField.text = Code;
        }
    }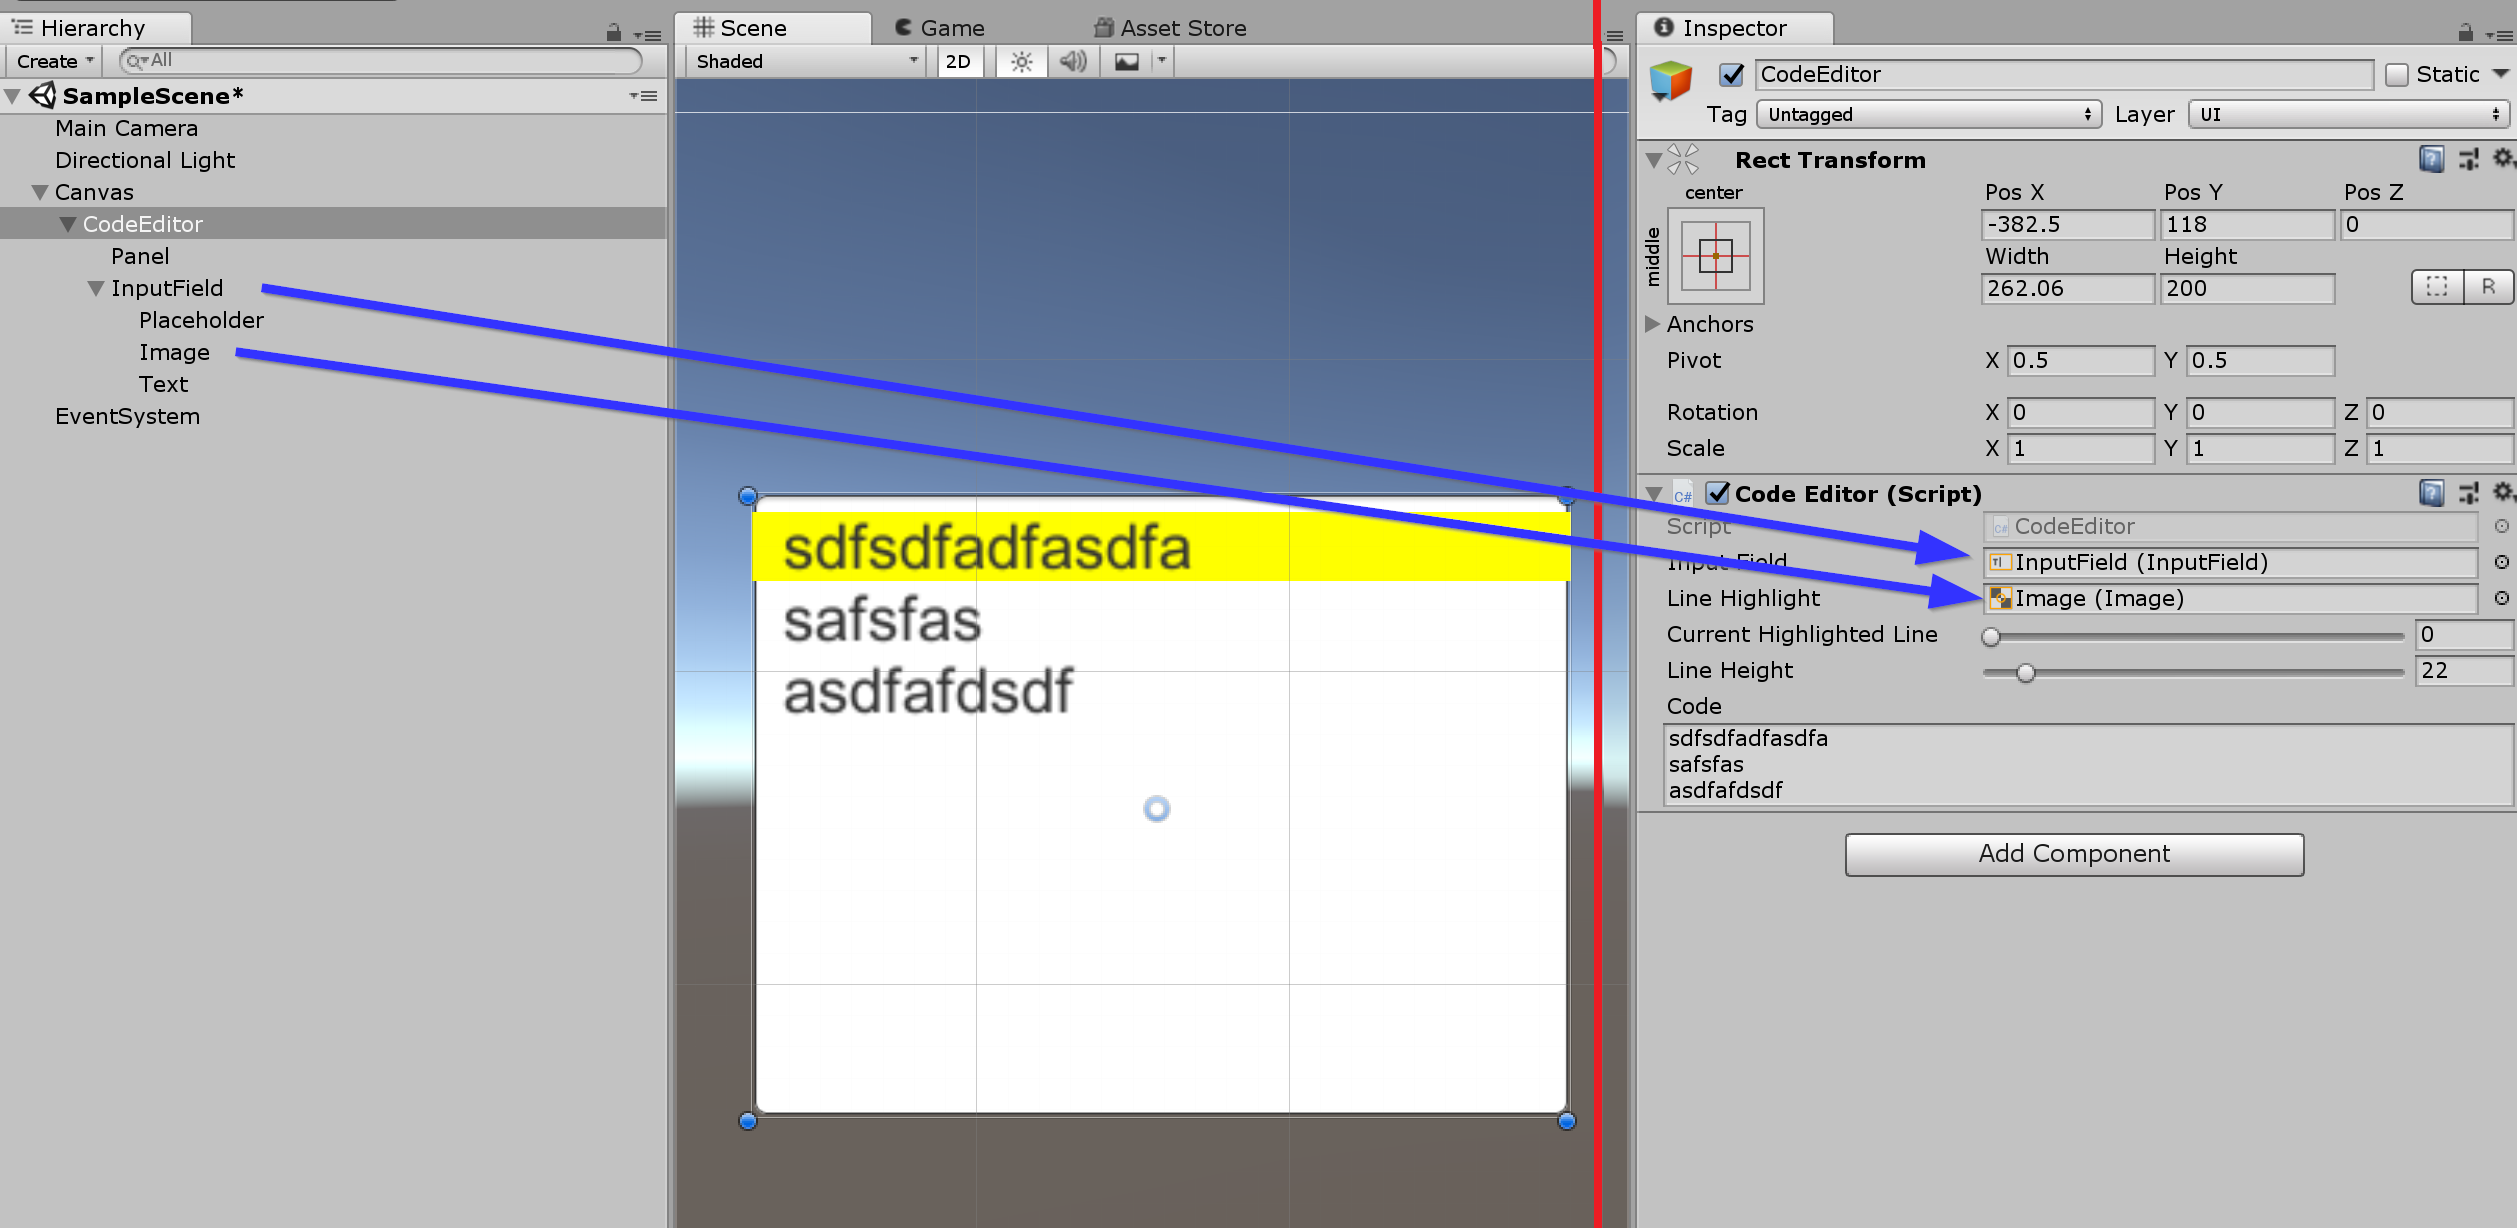
}- Add the “Code Editor” script onto the “CodeEditor” gameobject

- Drag across the the InputField and Image elements to bind them to the CodeEditor script
- Create a new folder under assets called “Prefabs”, and drag the GameEditor gameobject from the scene heirachy into the folder to create a prefab.
Adjusting and using the code editor UI Element
To use the code editor, it can be dragged from the prefab folder and dropped into any scene, then positioned in the UI. It’s properties are:
LineHeight (int) - Height of each line of text, equivilent to font size.
Current Selected Line (int) - Line number that is currently selected.
Code (string) - Code currently entered into the editor window. Supports multiline text.
Demo
Source Code
Tutorial source code can be found here